Link boxes for cable screen cross-bonding
Screen cross-bonding is an important element of many 6-500 kV cable lines built with single-core XLPE-insulated cables. Therefore, special attention should be paid to the design of the cross-bonding nodes, the specifics of their installation and operation.
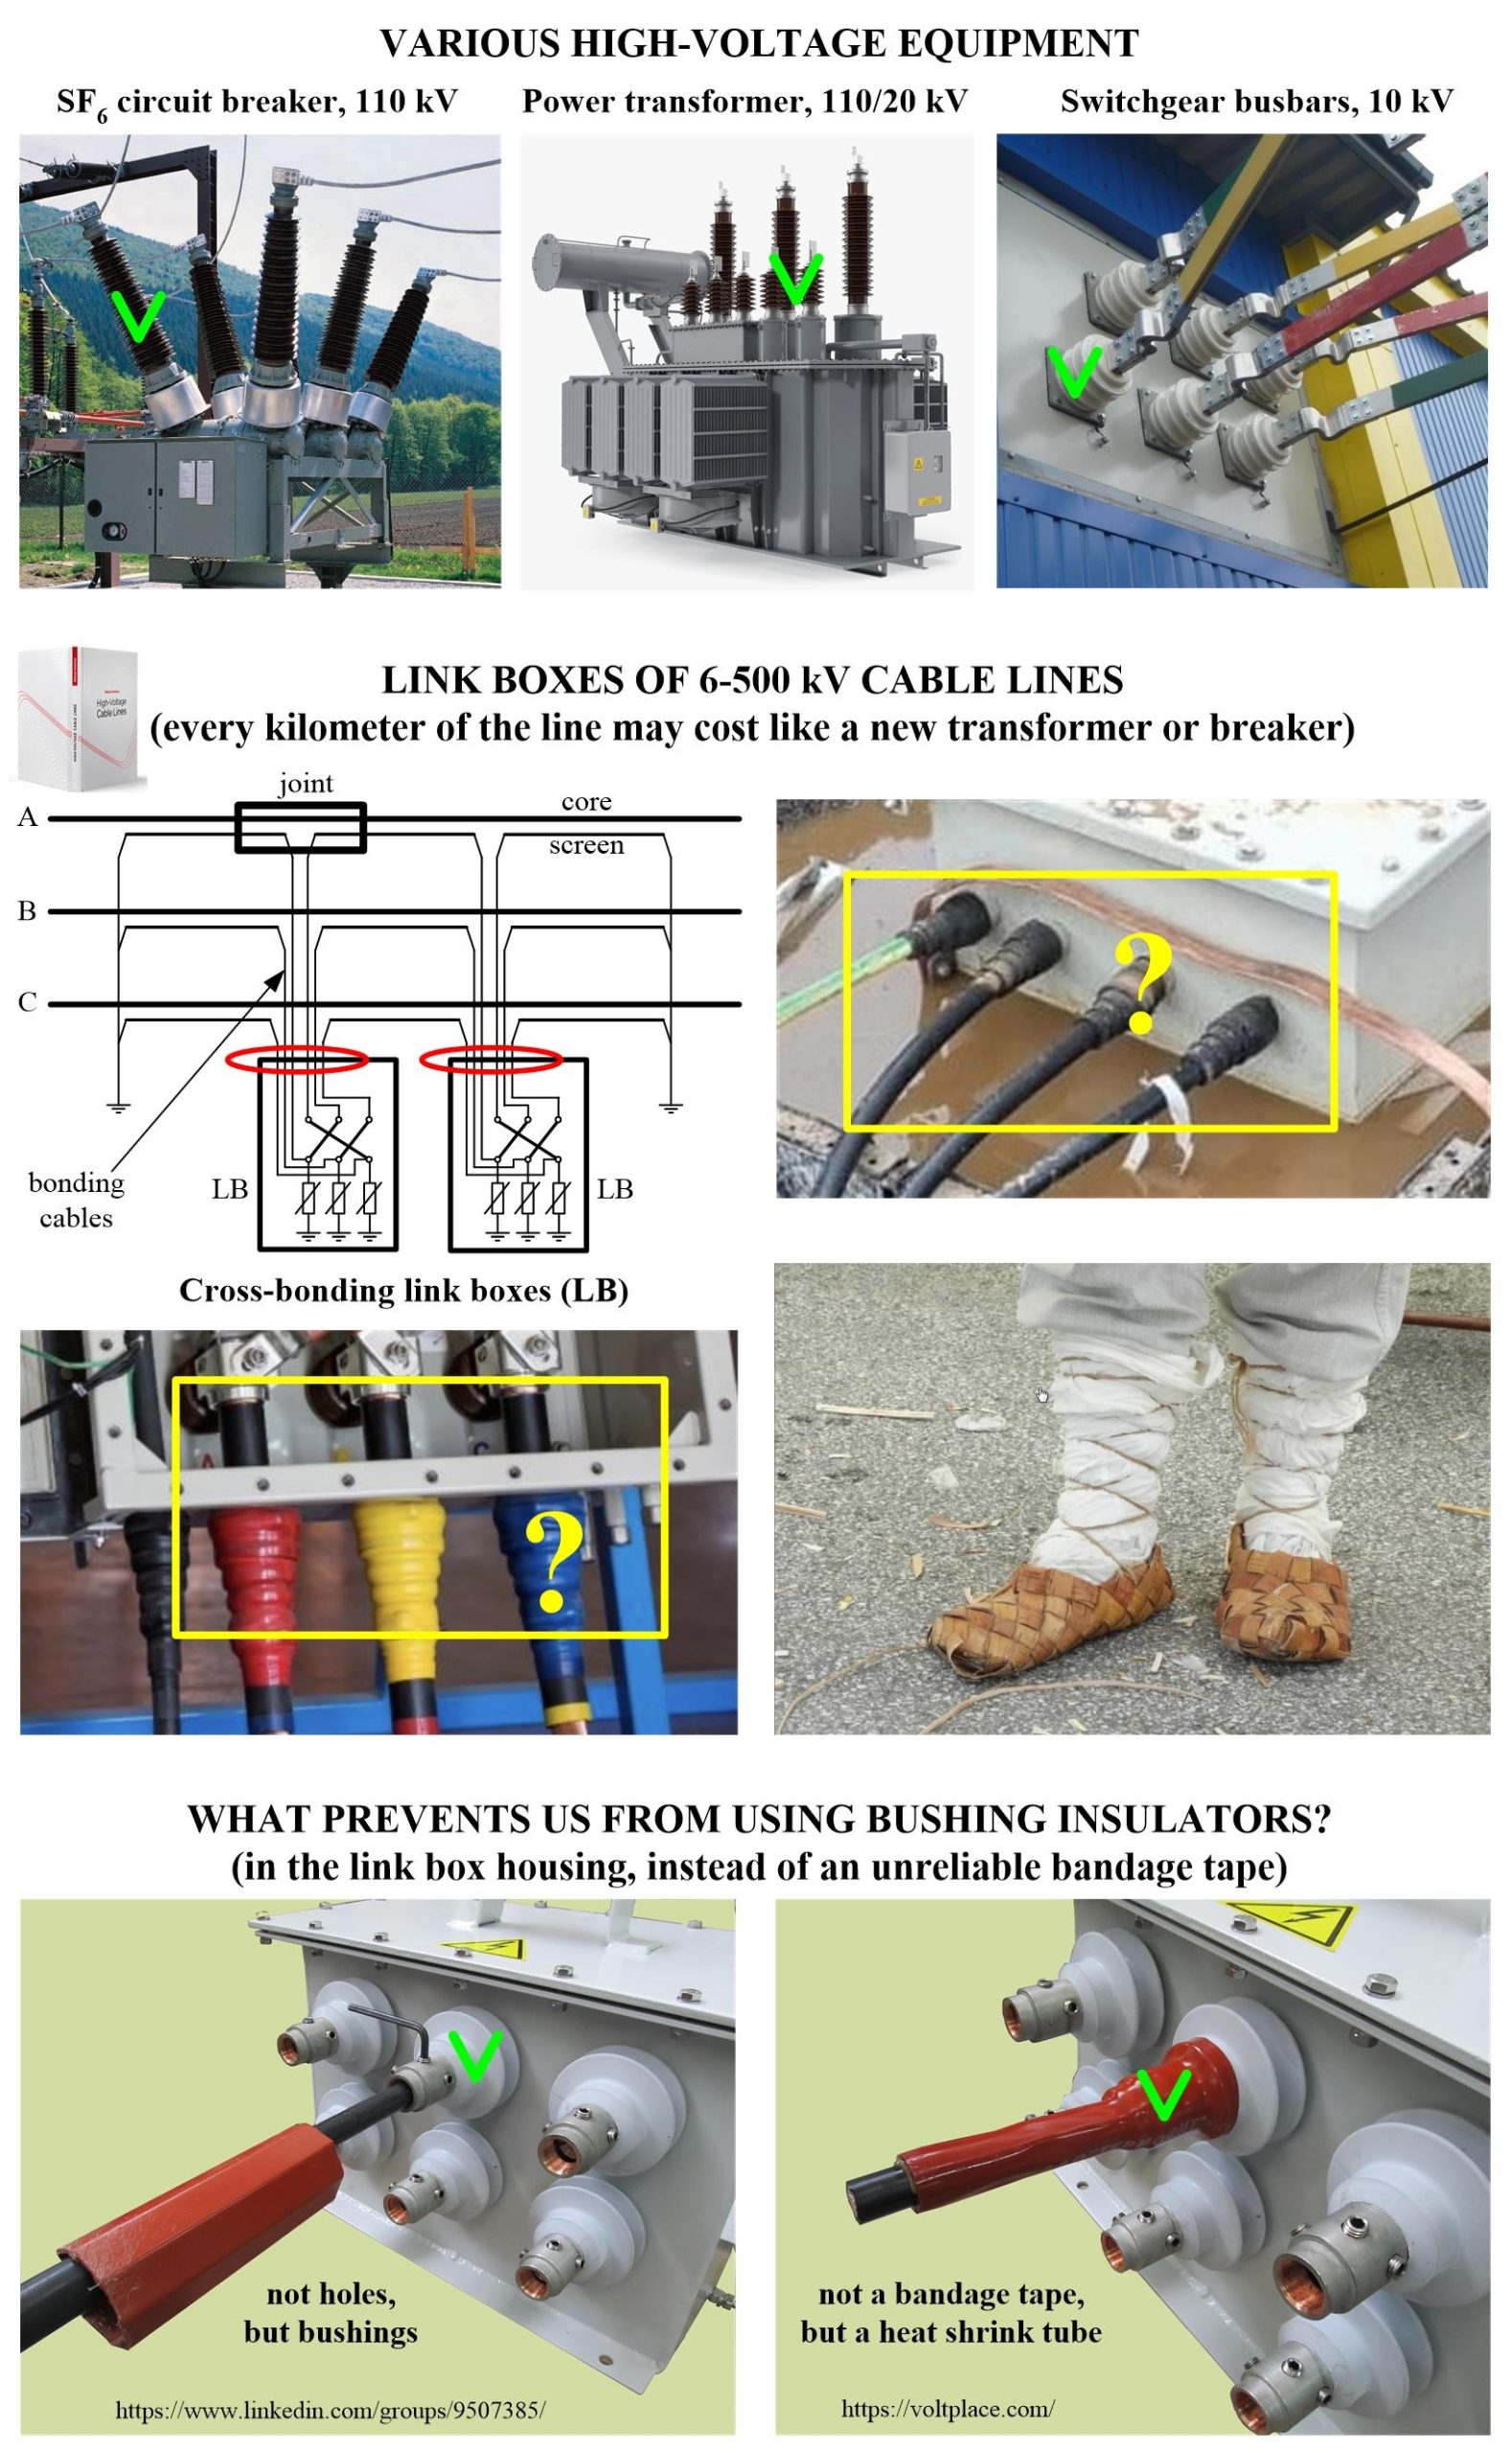
The screens of the main 6-500 kV high-voltage cable are removed from the cable joint using special 3-6 kV bonding cables and connected to the cross-bonding link box (LB). Let’s talk about one small detail today – how exactly to connect bonding cables to the link box.
The design of the link boxes is different all over the world. But most of the boxes are similar in one thing – in the way the bonding cables are connected. There are large holes in the housing of the box, into which 6 bonding cables (or 3 coaxial) are inserted, after which the gap between the cable and the side wall of the box should be sealed so that water does not enter the box during operation. There are many cases when bandage tapes are used for sealing, as shown in the photo. To be honest, it doesn’t look good, especially in the 21st century, especially if compared to other equipment of the network which always use bushing insulators.
To install the link box of the mentioned design, we had to:
1️⃣ Open the box (break the high-quality factory sealing).
2️⃣ Put bonding cables into the box through holes in the side wall (to make it easier to put a cable of any core cross-section and outer diameter, there are universal holes of increases diameter).
3️⃣ Equip the bonding cables inside the box with lugs and connect them to sheath voltage limiters (to make it easier to work with cables in the box, the box is usually made of a large size, which increases the weight of the box, its cost, and makes it difficult to put the box into an underground manhole through a manhole hatch).
4️⃣ Seal the holes in the side wall of the box (normally it is difficult to do this, because there are big gaps between box and bonding cable).
5️⃣ Close the lid of the box, making sure that sand or small stones do not get under the rubber seal (when closing, it is necessary to tighten 20-30 bolts evenly).
Manipulations 1-5 take a long time, and most importantly, they cannot guarantee the tightness of the box when it is operated below ground level. The solution is very simple – let’s use pass-through insulators, as all manufacturers of conventional high-voltage equipment do.
Installation of a box with bushing insulators takes 30 minutes only:
✅ It does not require opening the box (20-30 bolts) and breaking its tightness checked by special low-pressure test on the factory.
✅ The bonding cables are connected to the insulators from the outside, which means that the installer does not need to work inside the box (all connections inside the box were done on the factory).
✅ Does not use bandage tapes, but uses a proven reliable heat shrink (red tube in the photo from below).
One of the results of no need to work with cables inside the box, is that the size of the box can be reduced, made the box lighter and cheaper, and easily carried through the manhole cover underground.
A few more considerations about link boxes are outlined in the text of Item 12.4.1 of the book “High Voltage Cable Lines“. I will continue to talk about them, as well as many other issues discussed in the book.